Unidentified Network Error in Windows 10
“Unidentified Network” Error has been reported by users for a long time and it usually occurs while trying to connect to internet using both WiFi and Ethernet. This error can occur due to various reasons, ranging from outdated driver software, change in network settings, incorrect IP configuration to things going wrong during automatic Windows update.
1. Try Network Troubleshooter
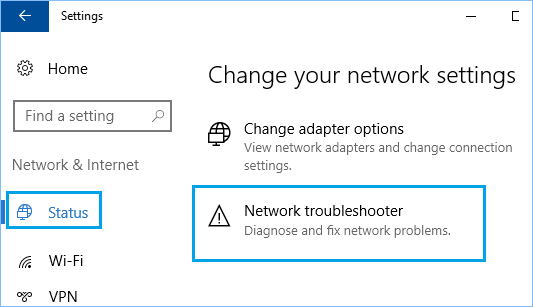
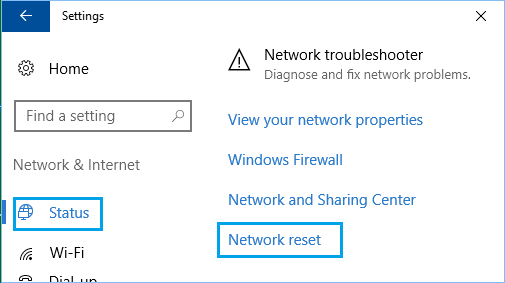
The built-in Network Troubleshooter in Windows 10 can be trusted to fix this problem. Go to Settings > Network & Internet > scroll down in the right-pane and click on Network Troubleshooter.
Wait for the troubleshooter to detect issues and follow the onscreen Instructions to fix problems on your computer. If the Network Troubleshooter is unable to fix the problem, move to other trouble shooting steps.
2. Restart Computer
The simple act of restarting the computer can fix software glitches and is known to help in fixing internet connectivity problems.
3. Power Flush Modem/Router
Unplug the Modem/Router from its power supply source and patiently wait for 60 seconds. After 60 seconds, reconnect the Modem/Router to its power supply source and wait for all the lights to turn green. Now, see if your computer is able to connect to internet, without any error message.
4. Renew IP Address & Reset Network
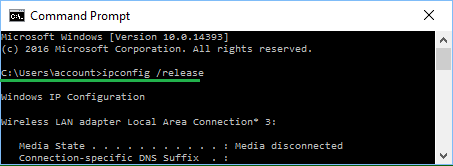
Sometimes, the problem is due to your IP Address being improperly assigned or not being recognized on the network. Open Command Prompt as Admin > type ipconfig /release and press the Enter key.
This will release the current IP Address of your computer. Next, type ipconfig /renew and press the Enter key to Renew the IP Address of your computer.
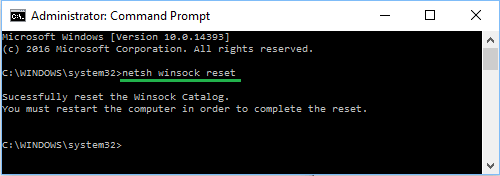
Finally, type netsh winsock reset and press the enter key.
After this Restart your computer and see if your computer can connect to internet.
5. Update Network Driver
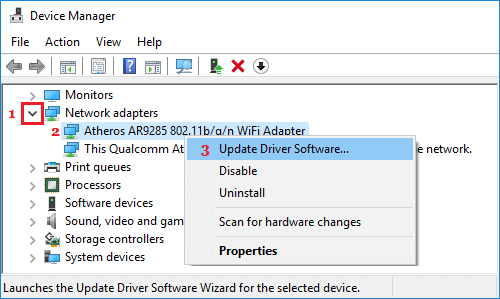
As mentioned above, Unidentified Network Error can also be caused due to outdated or corrupted network drivers. Right Click on the Start button and click on Device Manager > On Device Manger Screen, expand Network Adapters entry > right-click on WiFi Adapter and click on Update Driver Software.
Tip: In case you see too many entries, look for something that says Network or 802.11b or has WiFi in it. On the next screen, select Search Automatically for Updated Driver Software option and wait for your computer to search for Updated Driver Software. Windows will either inform that the latest Driver Software is already installed or come up with the Latest Driver Software that you can install.
6. Reset Network Settings
If above methods did not help, the problem could be due to misconfigured or corrupted Network Settings on your computer. Go to Settings > Network & Internet > scroll down in the right-pane and click on Network Reset option.
On the next screen, click on Reset Now button to Reset Network Settings on your computer to Factory Default Settings. Note: This process will erase all your current Network Settings, including your WiFi and VPN Passwords. Hence, it is a good idea to note down your WiFi and VPN Passwords.
7. Use Google DNS
Consider switching to Google DNS, if you are frequently experiencing network connectivity issues on your computer. The steps to switch your computer to Google DNS can be found in this guide: How to Switch to Google DNS On Windows and Mac
How to Free Up Hard Disk Storage Space in Windows 10 How to Change MAC Address in Windows 10

